Node.js 서버와 Redis를 연동하여 나중에 공부해볼 Redis Session관리를 하기전에 Node 서버와 Redis가 연동이 되어야 하기 때문에 Node와 Redis연동하는 방법을 알아보도록 하겠습니다 .
먼저 Node.js에서 redis 를 사용하기위해서는 redis package가 필요합니다
# npm install redis
설치가 다 되었다면 저는 localhost:3000/ 로 접근했을시 Redis에 있는 데이터를 꺼내서 콘솔에 출력해보도록 하겠습니다 .
routes/index.js

const express = require('express');
const router = express.Router();
const redis = require('redis');
const redisClient = redis.createClient({
    host : "127.0.0.1",
    port : 6379,
    db : 0,
    password:"1q2w3e4r!@"
});
/* GET home page. */
router.get('/', function(req, res, next) {

    redisClient.get("NAME" , (err , result) => {
        console.log(result)
    });
    res.render('index', { title: 'Express' });
});

module.exports = router;
위의 소스 코드는 express로 생성된 project에서 routes/index.js 파일에 redis 설정을 추가한 내용입니다 .
추가된 내용은 아래와 같습니다.
const redis = require('redis')
const redisClient = redis.createClient({
    host : "127.0.0.1",
    port : 6379,
    db : 0,
    password:"1q2w3e4r!@"
});


router.get('/', function(req, res, next) {

    redisClient.get("NAME" , (err , result) => {
        console.log(result)
    });
	...
});
npm 으로 설치한 redis package를 require해주고 require한 redis를 통해 클라이언트를 생성합니다. 옵션은 host, port , db , password를 사용합니다 . 저는 localhost redis와 6379포트를 사용하고 있으며 db는 (Redis select를 의미) 0번을 사용할 것이며
AUTH가 등록되어있어 password를 옵션으로 설정하였습니다 .
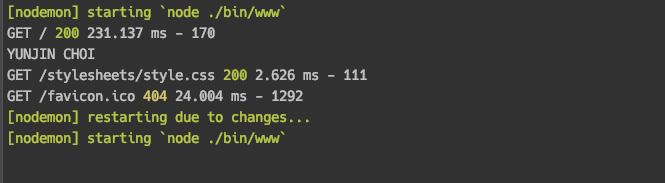
제 local Redis server에는 NAME이라는 KEY로 제 이름이 저장되어 있어 console창에 YUNJIN_CHOI가 출력된 것을 확인 할 수 있습니다 .
생각보다 어렵지 않으니 한번씩 해보시는걸 추천드립니다 .
반응형
'Node' 카테고리의 다른 글
| [Node] Node + Mongodb (mongoose 사용 ) (0) | 2019.06.19 |
|---|---|
| [Node] 세션의 사용법과 express-session 미들웨어 설치 (1) | 2017.12.24 |
| [Node] 쿠키의 사용법과 cookie-parser 미들웨어 설치 (0) | 2017.12.24 |
| [Node] fs 모듈 - 첫번째 파일 읽기 (0) | 2017.12.14 |
| [Node]url 관련 모듈 사용해보기 (0) | 2017.12.14 |


댓글